Most of us want our homes to feel brighter and more put together, but not everyone wants to spend a large amount on wall décor. I’ve worked on mirror walls in small flats, rented apartments, and family homes, and I can honestly say this is one of the most cost-effective ways to transform a space.
The key isn’t spending more money. It’s planning properly and understanding how mirrors behave in a room. Here’s how to do it in a practical, realistic way.
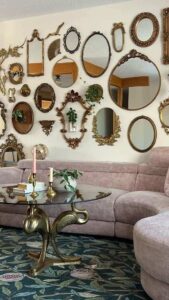
1. Repurpose Old Mirrors Instead of Buying New Ones
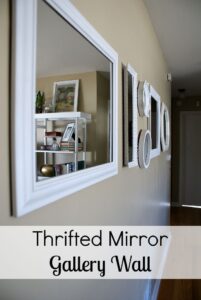
If you’re on a budget, don’t start at a décor store. Start at thrift shops, garage sales, flea markets, or online resale groups. I’ve found solid wood-framed mirrors for a fraction of retail prices.
When picking mirrors:
-
Check the glass for major black spots or damage.
-
Ignore outdated frame colors — paint fixes that.
-
Don’t worry if shapes don’t match perfectly.
How to refresh them:
-
Clean thoroughly.
-
Lightly sand glossy frames.
-
Spray paint in one consistent color — matte black, antique gold, or soft white are safe options.
-
Let them dry completely before hanging.
Why this works:
Different shapes create character. A consistent frame color keeps everything from looking chaotic.
Common mistake: Using too many frame colors.
Fix: Choose one main color and stick with it.
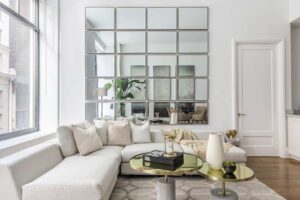
2. Create a Clean Geometric Grid for a Modern Look
If you prefer clean lines, buy identical small mirrors (square or round). This works especially well above sofas, beds, or console tables.
Practical workflow I follow:
-
Measure the wall.
-
Find and mark the center.
-
Decide spacing (2–3 cm looks balanced).
-
Tape the layout on the wall before installing.
-
Start from the center and move outward.
Grids look simple, but they require precision. Even slight uneven spacing becomes noticeable.
Read This Also: Bedroom Ideas for Adults: Smart, Stylish & Practical Designs
3. Upgrade Plain Mirrors with DIY Frames
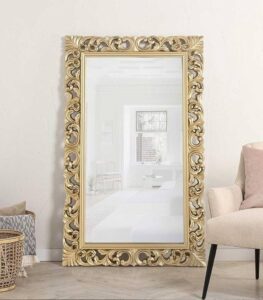
Plain mirror tiles can look unfinished. Adding simple frames makes them feel custom.
What you need:
-
Plain mirrors or tiles
-
Foam board or thin plywood
-
Paint, contact paper, or trim
-
Strong adhesive
Steps:
-
Cut board slightly larger than the mirror.
-
Paint or wrap it.
-
Attach the mirror centrally.
-
Let it dry flat.
You can match rustic, modern, or classic interiors depending on the finish you choose.
From experience: Always let adhesive cure properly before mounting. Rushing this step causes mirrors to shift later.
4. Combine Mirrors with Plants
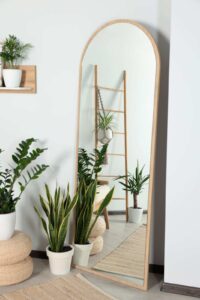
Mirrors double whatever they reflect. When placed behind hanging plants or wall planters, they amplify greenery and natural light.
Best placement:
-
Near windows
-
Behind trailing plants
-
In darker living rooms
Important: Make sure the mirror reflects something pleasant — light, plants, or open space. Avoid placing it opposite clutter or exposed storage.
5. Faux French Window Style for Small Rooms
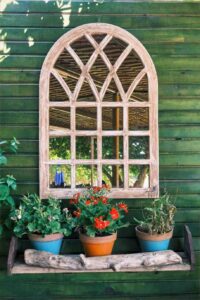
If a room feels closed in, you can create the illusion of windows.
Arrange rectangular mirrors in a window-pane pattern. Add black or white trim between them to mimic window frames.
This works particularly well in:
-
Narrow living rooms
-
Hallways
-
Dining areas without windows
It creates depth and gives architectural interest without construction work.
6. Mix Mirrors with Art for Balance
If you already have a gallery wall, don’t remove everything. Replace a few frames with mirrors.
Mirrors:
-
Break visual heaviness
-
Add brightness
-
Create dimension
Alternate art and mirrors in a loose grid for a balanced look.
Read This Also: IVF with Own Egg vs Donor Egg: Which Option Is Right for You?
7. Affordable Materials That Still Look Good
Here’s a simple comparison to help you choose:
| Material | Best For | Things to Know |
|---|---|---|
| Acrylic mirror sheets | Large walls | Lightweight but scratch easily |
| Mirror tiles | Grid designs | Affordable and easy to arrange |
| Old CDs | Mosaic accent | Time-consuming but creative |
| Old window frames + mirrors | Rustic spaces | Heavier, needs strong support |
Real-World Installation Checklist
Before drilling anything, go through this:
- Lay everything on the floor first
- Mark the wall center point
- Keep spacing consistent
- Use proper wall anchors for heavy mirrors
- Avoid reflecting clutter
- Install near natural or soft lighting
Planning prevents unnecessary holes and uneven layouts.
Final Thoughts
A mirror wall doesn’t need to look fancy to be effective. In fact, the best ones I’ve seen were simple and thoughtfully arranged. The transformation comes from placement, spacing, and consistency — not price.
If you take your time measuring, choose a clear layout, and think about what the mirror will reflect, you’ll end up with something that genuinely improves your space.
FAQs
1. What is a DIY Mirror Wall?
A DIY Mirror Wall is a decorative wall design where multiple mirrors are arranged creatively to make a room look bigger and brighter. Many homeowners use DIY Mirror Wall ideas to improve small spaces affordably.
2. Is a DIY Mirror Wall suitable for small rooms?
Yes, a DIY Mirror Wall works very well in small rooms. It reflects light and creates depth, making the room appear larger. Proper placement is important for the best results.
3. Can renters install a DIY Mirror Wall?
Renters can install a DIY Mirror Wall using lightweight acrylic mirrors and removable adhesive strips. This prevents wall damage and makes removal easy when moving out.
4. What is the best spacing for a DIY Mirror Wall?
For a clean look, keep 2–3 cm spacing between mirrors. Even spacing ensures your DIY Mirror Wall looks balanced and professional.
5. Which mirrors are best for a DIY Mirror Wall?
Glass mirrors offer better clarity, while acrylic mirrors are lightweight and safer. Choose based on your wall type and budget for your DIY Mirror Wall.